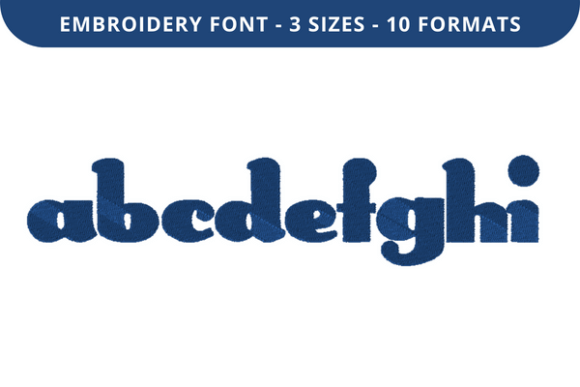
Bunny Ears A to I: A Craft Fair Embroidery Review
First Impression: Whimsy Meets Handmade Charm
When I unzipped the Bunny Ears A to I embroidery file, I immediately imagined a spring market booth filled with pastel linens and giggling toddlers. This isn't just another blocky alphabet. Each letter carries a delicate set of bunny ears, turning simple monograms into playful storybook moments. The mood feels soft, slightly rustic, and undeniably cute — exactly what catches a browser’s eye at a busy craft fair.
For a craft fair product, readability at a distance matters. The ears create a distinctive silhouette that separates Bunny Ears A to I from standard script fonts. Even from four feet away, the shape reads as intentional and handwritten, not machine-stamped. I'd place this firmly in the “decorative personalization” category, ideal for customers who want to gift something that feels one-of-a-kind without losing that polished stitch finish.
Which Products Let Bunny Ears A to I Truly Sing?
After testing mental layouts and a few quick stitch-outs on scrap cotton, I see this embroidery font shining brightest on:
- Tote bags — A single oversized initial on a canvas tote becomes an instant statement. Pair with a floral border, and you have a top-selling handmade product.
- Tea towels — A discreet “A” or “B” on the corner of a flour-sack towel gives farmhouse elegance. The bunny ears keep it from feeling too formal.
- Fabric pouches — Perfect for personalized pencil cases. This is where Back To School suddenly clicks; a child’s name stitched in Bunny Ears A to I feels special, not juvenile.
- Baby onesies and bibs — On soft cotton, the gentle curves make each letter look like a tiny heirloom.
- Lunch bags and snack sleeves — Another nod to school markets. A single letter or short name in bunny ears makes a practical item memorable.
- Aprons — For a boutique baker, a monogram just above the pocket gives a curated shop vibe.
While caps and curved surfaces are tempting, I’d caution that the intricate ears may warp on a hat’s seam. Bunny Ears A to I thrives on flat, stable fabric areas where the letterform can breathe.
Testing Stitch Clarity on Real-World Textures
I always recommend slicing a design on similar-weight fabric before committing to production. With a font that blends playful details and letter structure, fabric texture becomes the make-or-break factor. On smooth, tightly woven cotton or linen, Bunny Ears A to I registration was crisp; the ears maintained their tiny inner curves beautifully. On looped terry toweling, however, the fine lines began to blur. If you aim for tea towels, choose flat-woven or tight-loom varieties.
Dark fabrics demand extra thought. On black or deep navy, the bunny ears can disappear if you stitch with a thin, single-color thread. I’d advise a slightly thicker thread or a soft pastel that contrasts boldly. Reverse: on stark white, a pale pink or mint thread looks airy, but a bright coral adds enough punch to stop the design from fading into the background.
Practical Production: Hooping, Stabilizer, and Scale
For small shop product makers, speed and repeatability are everything. Here’s what I learned while planning a batch of twenty monogrammed totes:
- Hoop size — The font file likely fits within a standard 4x4 hoop for a single letter, but always verify. When stitching a word or date, you may need a larger field. Don’t guess; open the digital embroidery file in your software first.
- Stabilizer choice — A medium-weight cutaway stabilizer kept the ears from puckering on quilting cotton. For towels, a tear-away with a water-soluble topper saved the top loops from sinking.
- Scale limits — At roughly 2 inches tall, each letter holds detail beautifully. Scale much smaller, and the inner ear curves start to fill in, turning the bunny into a fuzzy blob. I wouldn’t go below 1.5 inches for a clear read.
- Thread colors — Keep two or three pastel shades on hand (soft peach, sage green, dusty lavender) plus a crisp white. These play up the whimsy without looking cartoony, which is a risk with novelty fonts.
How Bunny Ears A to I Shapes Buyer Engagement at a Booth
At a live craft fair, customers react to texture and personality before price. The moment someone picks up a tote bag design with this font, their thumb will trace the satin-stitch ears. I’ve seen that tactile engagement convert to sales faster than any “handcrafted” sign. It communicates handmade quality instantly. For your table display, consider stacking items vertically: a personalized apron hung above a matching tea towel, then a coordinating pouch beside it. This rainbow of coordinated pieces shows the font’s flexibility and encourages multi-item purchases.
Because Bunny Ears A to I works as a small accent or an oversized focal point, it fits both minimal and maximal booth aesthetics. On a simple cream linen pillow cover, a single letter takes on an expensive, custom-monogram look. On a busy patterned apron, the letter stands out as a deliberate personal touch rather than getting lost.
Photographing the Design for Etsy and Digital Listings
If you’re an Etsy seller selling either the finished product or the embroidery file itself, this font photographs like a dream under natural window light. The raised stitchwork casts tiny shadows that give depth to flat product shots. I’d style your printable mockup or real-life sample with a sprig of dried lavender, a wooden spool of thread, and a linen backdrop. That setup reinforces the rustic-chic feel and draws the eye directly to the letterform. Avoid cluttered backgrounds—let the bunny ears do the talking.
For digital sellers offering the embroidery file itself, include a close-up photo of a single letter beside a ruler. This answers the buyer’s unspoken question: “Will this look as delicate on my machine as it does on yours?” Also show the design stitched on a few different fabric bases, so other small shop product creators can envision their own end uses.
Designing a Cohesive Collection That Sells
One of the smartest moves with Bunny Ears A to I is to build a tiny capsule collection around it. I sketched out a “Little Meadow” set for my imaginary booth: a natural canvas apron, a pocket-sized patch with a single letter, a set of two tea towels, and a drawstring gift pouch—all featuring the same ivory thread and soft gray-green fabric. Repetition breeds brand consistency, and customers often buy the full set because it looks visually complete.
Adding a commercial embroidery license, when available, lets you sell these pieces legally. Before cutting fabric for 30 linens, confirm the license covers finished product sales at markets and online. Many font sets come with personal-use only restrictions; a quick email to the digitizer can save a lot of heartache.
Real Design Notes from the Stitch-Out Session
Every experienced embroiderer knows the machine doesn’t always read your mind. Here’s my cheat sheet after testing Bunny Ears A to I:
- Test on scrap fabric first. I cannot stress this enough. Run a single letter to check thread tension and density before committing to a full name.
- Inspect stitch density. The ears add extra stitches, so watch for needle deflection on thick thread layers. If your machine balks, very slightly reduce density in your software.
- Check spacing between letters. When typing out a name, the default kerning might crowd those tiny ears. Adjust manually for breathing room.
- Create at least one real mockup. A stitched sample reveals things a digital preview hides, like how the thread catches the light.
- Compare fabric colors. A mid-tone blush pink fabric can muddle a light pink thread. Hold your thread spool directly against the fabric before hooping.
- Confirm your hoop size. Make sure the design fits comfortably within your largest hoop if you plan to stitch a full name. Overlapping hoops invites misalignment.
When to Skip the Bunny Ears and When to Go All In
This font isn't for every product. On a slippery nylon jacket or a thin jersey knit, the dense satin ears might drag the fabric and warp. On heavily textured throws, the definition gets lost. But for smooth cotton, linen blends, polished canvas, and even high-quality felt patches, Bunny Ears A to I delivers a premium, hand-drawn feel that buyers willingly pay extra for. As a handmade product detail, it signals intention and care—exactly what sets handmade market goods apart from mass-produced items.
Final Thoughts for the Weekend Craft Fair
If you want to infuse your booth with a gentle, storybook aesthetic that appeals to gift shoppers, new parents, and teacher-appreciation buyers, this embroidery font earns its keep. It personalizes quickly, stitches out with minimal trims, and invites that crucial fingertip touch. For quick-turn craft fair products, I’d start with a batch of ten monogrammed tea towels and five tote bags in natural tones. Watch how many people pause, smile, and pick up a sample. Then let Bunny Ears A to I do the sales pitch for you.
Remember, all design assets—whether you're a digital embroidery file seller or a maker of finished pieces—deserve real testing. Confirm hoop compatibility, go slow on the first stitch, and always keep a swatch book of your thread colors handy. The result is a cohesive, utterly charming product line that sets your small shop apart, one bunny-eared letter at a time.